
House Cleaning Tips: 20 Essential Pointers to Keep Your Home Spick and Span

It can often feel like your housework is never done.
Just when you think that you are finished, you feel like there is some other part of your home that you need to tend to.
Well, if you are looking for house cleaning tips and hacks to make your life a little easier, then you have come to the right place.
Here, you will be able to find some unusual and useful pointers that will revolutionize the way that you clean your home.
So, without any further ado, let’s get started…
Pointer #1: Vacuum Your Home the Right Way
Since you have probably been using a vacuum cleaner for as long as you can remember, you probably think that you have gotten your technique just right.
However, there is a good chance that you aren’t vacuuming your home the right way. To know how to do this better, follow these steps…
Step 1: Use a stiff paintbrush to dislodge dust from around the edges of furniture. This way, you will not have to move the furniture around every time that you clean.
Step 2: Move the vacuum slowly across the floor so that you are actually picking up all of the dirt from the floor.
Step 3: First, vacuum the room horizontally, from one end to another.
Step 4: Then, vacuum the room in a vertical manner, working backward to your starting point.
Pointer #2: Update Your Mop with a More Hygienic Option
Chances are, you are still using a cotton string mop in your home. After all, it gets the job done, right?
Well, actually this may not be true. There is some research that shows that microfiber mops are actually a much better choice.
These mops get rid of a lot more microscopic germs than the traditional mops. So, if you want to maintain a more hygienic household, you may want to consider making a switch.
Next up, we will talk about how you can use microfiber mops more efficiently as well…
Pointer #3: When Mopping, Use a Spray Bottle Instead of a Bucket
Like most people, you probably fill up a bucket with water and floor cleaner and then proceed to drag it around as you mop your floor.
However, what you may have noticed is that this bucket can often make a bigger mess as the water tends to spill all over, every time you move the bucket.
To prevent this, you will simply need to substitute your bucket with a 16-ounce spray bottle. Fill up the bottle with a mix of water and floor cleaner and screw the spray cap on.
Then, spray the areas of the floor that you want to mop as you go. This way, only a small amount of water will be on the floor at any given time.
You will be able to mop up your floors a lot faster too.
Pointer #4: Use Baking Soda to Get Scribbles off the Wall
Why is it that your little Picassos love using your wall as their canvas?
This is such a tricky surface to clean as you can’t risk scrubbing off or fading the paint that is underneath the drawings.
Fortunately for you, your solution can be found in your pantry cupboard – baking soda.
Simply dampen a cloth and dip it in some baking soda. It is then just a matter of gently rubbing along the mark until the powder rubs it away.
Pointer #5: Get Stains Out of Chopping Board with Lemon and Salt

It doesn’t seem to matter how thoroughly you clean your chopping board, there will always be stains left behind.
If you want to make the board look as good as new, you just need two ingredients:
- Salt
- Lemon
First, sprinkle the salt on the stains. Of course, if you want to scrub the whole cutting board, you can shake the salt all over.
After this, cut the lemon in half and use one of the halves to scrub the salt into and across the board.
With just a little bit of elbow grease, you will be able to get rid of all residual stains. Next, just rinse out the surface and enjoy your fresh, clean chopping board.
Pointer #6: Clean Your Patio Furniture with Dish Soap
Your patio furniture is exposed to rain, dust, dirt, and various other types of debris. This means that it can get grimy incredibly fast.
The downside to this, of course, is that it isn’t exactly easy to clean out patio furniture.
Well, that is, until now:
If you have metal or painted wood furniture, all you need is:
- Dish soap
- Warm water
- A sponge
- Drying towel
Now, just complete these steps:
Step 1: Dip the sponge in a mix of warm water and dish soap. The composition of the dish soap will cut through the grime, making it easier to scrub away.
Step 2: Wipe down the furniture with clean water.
Step 3: Dry the furniture incredibly well with a good towel.
Pointer #7: Get Rid of Fingerprints on Stainless Steel Appliances with Rubbing Alcohol
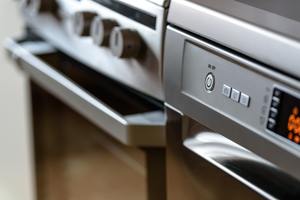
There is nothing quite like the look of gleaming stainless steel appliances in your kitchen.
The only downside is that these surfaces accumulate smudges and fingerprints like they are magnets.
To make it worse, these aren’t even that easy to remove.
To make this process a little simpler, you need rubbing alcohol and a microfiber towel.
Combine one part water with one part rubbing alcohol and spray it on the surface of the appliances.
You will then have to wipe down the surface with a microfiber cloth – just make sure that you wipe along the direction of the grain for the best results.
Afterward, you get to enjoy shiny and smudge-free appliances.
Pointer #8: Freshen Up Your Mattress with Baking Soda and a Vacuum Cleaner
Although you change your sheets at least once a week, there is a good chance that you aren’t paying as much attention to your mattress.
The truth is, mattresses are large and bulky and don’t have a removable cover. So, they can be notoriously difficult to clean in any way.
There are ways, however, that you can freshen up your mattress so that it smells fresh and feels clean.
Once again, it is baking soda to the rescue.
After you have stripped all of the bedding off, you should sprinkle baking soda on the surface of the mattress.
You can use a sieve to make sure that the baking soda is distributed evenly across the mattress.
It is then a matter of waiting for about an hour or so before you use your vacuum cleaner to suck up all of the baking powder.
Of course, you should make sure that the vacuum cleaner attachment has been specially cleaned before you use it on your mattress.
Pro Tip: if you want your mattress to smell even better, mix some essential oils into the baking soda before sprinkling it on the mattress. To improve your sleep, you should use lavender essential oil.
Pointer #9: Hide Scratches in Wood Furniture with Walnuts
It turns out that walnuts aren’t just great for you health-wise; they can also be used to breathe some new life into your wood furniture.
Now, if you have any wooden surfaces in the house, it is a good bet that there are at least a few scratches on them.
If so, all it will take is a few walnuts to remedy the situation.
Before you do anything else, you will need to remove the flesh of the walnuts – you will only be working with the ‘flesh’.
Take the walnut and gently rub it into the scratches or the marks in the wood. You will need to do this until you can see the oil from the walnut covering the surface.
Following this, you can use a soft cloth to rub the oils further into the wood. If it is a small scratch, you can use your finger to rub the spot.
Then, wipe away any excess oil and voila! You will have a scratch-free surface.
Pointer #10: Dust Your Fan Blades with a Pillowcase
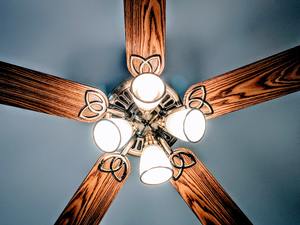
While cleaning your fan is important to creating a clean and healthy environment, it can also be a bit harrowing.
Fortunately, all you really need is a pillowcase and a step ladder to get this job done within minutes!
Place the pillowcase over the fan blade, same as you would if you were slipping it on top of a pillow.
Then, drag the case along the fan blade so that the inside of the pillowcase picks up all of the dust and dirt.
Repeat this motion with each blade and enjoy clean fan blades!
Pro Tip: if the fan blades are heavily coated in grime, spray some dusting spray on the inside of the pillowcase before using it to clean the blades.
Pointer #11: Disinfect and Deodorize Your Garbage Disposal with Vinegar and Baking Soda
At some point or another, your garbage disposal is going to need a thorough cleaning out. Of course, you can’t actually get to the drain to dislodge all of the grime and slime that has built up over time.
To get to these hard to reach places, you are going to need a homemade detergent that will clean out the drains for you.
Here is what you will need to make it:
- ½ cup of baking soda
- ½ cup of vinegar
- Hot water
This is what you will need to do with these ingredients:
Step 1: Pour the baking soda down the garbage disposal.
Step 2: Follow this up with all of the vinegar. You will now notice a fizzing mixture and a noise.
Step 3: Use the stopper to prevent this mixture from coming out
Step 4: Once the fizz has died down, use the hot water to flush the garbage disposal out while it is running.
Pointer #12: Clean Glass Shower Doors with Lemon Oil
Glass shower doors tend to be constantly caked with soap, scum, and water stains. To add to this, it can be rather difficult to get these stains off as well.
If you have found that most household cleaning products aren’t doing the trick, it is time to find something new – lemon oil.
Place a few drops onto a sponge and work it into the glass. For the best results, leave the oil on the door for at least half an hour.
Once the oil has had time to set, use a microfiber cloth to wipe off the excess.
You will instantly notice that the glass is cleaner.
Pointer #13: Get Your Faucets to Shine By Using Toothpaste
Another part of the bathroom that is prone to grime and scum are your faucets. Here, too, you may have found that most of your cleaning techniques and products have proven to be useless.
In this case, you can try switching things up with toothpaste. Just make sure that you use the non-gel variety.
Just polish it into your faucets and then wipe it off with a cloth. You will be left with gleaming and spotless faucets, fit for a king.
Pointer #14: Bring Back the Gleam to Your Silver with Natural Products
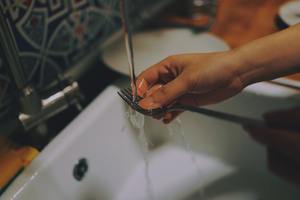
It seems rather odd that although you only bring out your fancy silver for special occasions, they still manage to look old and misused.
Well, luckily for you, this can actually be easily remedied. For this particular project, you are going to need:
- A durable plastic container
- Aluminum foil
- Boiling water
- Baking soda (2 tablespoons for each liter of water)
Step 1: Completely line the plastic container with aluminum foil. The shiny side should face up.
Step 2: Add enough boiling water to cover the silver items that you will be placing inside.
Step 3: Add the appropriate amount of baking soda to the water.
Step 4: Slowly place the silver items in the water. You will notice bubbling and fizzing but this is completely normal.
Step 5: After a few minutes carefully lift out the items. Note that they will be hot.
Step 6: Dry with a soft cloth.
Pointer #15: Clean Microwave with Steam
A lot of people aren’t comfortable with using harsh chemicals to clean the inside of the microwave.
After all, you don’t want to risk these chemicals transferring to your food later on.
Well, with this simple hack, you will not have to worry about this any longer.
The secret ingredients here are steam and lemon.
What you will require for this cleanup:
- Microwaveable bowl or cup
- ½ cup of water
- ½ lemon
Step 1: Put water into the bowl and then add the juice of the lemon to it.
Step 2: Place the bowl in the microwave and set the timer for three minutes
Step 3: Leave the bowl in the microwave with the door closed for 5 minutes.
Step 4: Open the door and take the bowl out
Step 5: Wipe down the inside of the microwave including the turntable and the door.
Pointer #16: Clean and Disinfect Your Sponge Thoroughly
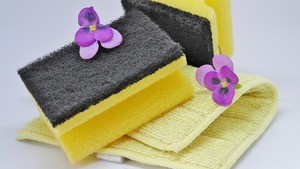
You do so much of cleaning with your sponge. However, how well do you actually clean out this sponge that you use?
If you are like most people, you probably just rinse out your sponge and leave it at that.
Unfortunately, this is not enough to truly disinfect your sponge. To make sure that it really is clean, you need to do a little more.
The first thing you will need to do is to rinse out the sponge thoroughly and remove any excess moisture.
Then, place the sponge in the microwave for a minute on high so that all of the bacteria and germs will be zapped.
Try to do this at least once a day, preferably at night.
Pointer #17: Easily Pick up Pet Fur with Rubber Gloves
If you are tired of using up tons of lint rollers in an effort to get rid of the fur on your furniture, then you will be pleased to know that there is another solution.
All you need is a pair of rubber gloves.
Put the gloves on and spritz the palms and fingers with water. Then, just run your hands over the fur and watch as it is all picked up.
Simply repeat this process until all of the fur is gone.
Pointer #18: Keep Your Mirrors Bright with Coffee Filters
Trying to keep your mirror streak-free, especially while you are cleaning it, can seem like a nearly impossible task.
Well, in fact, this only happens because you are using the wrong materials.
See, most types of cloths have some kind of lint attached to them. These are what cause the streaks and smudges on your mirror.
To avoid this, you should use coffee filters instead. These don’t contain any lint and will be sure to remove all signs of dust and grime from your mirrors.
Pointer #19: Remove Tarnish from Copper Pans with Ketchup
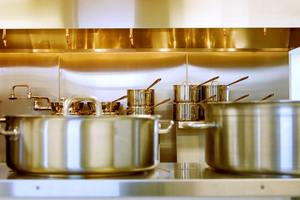
Yes, you read that right.
If your copper has begun to lose its luster with use, then your household condiment just might prove to be the solution you need.
Just squirt some ketchup onto a cloth and rub it into the pots and pans.
It will take a bit of elbow grease but once you rinse the sauce off, you will notice that the shine of your copper pans has been restored.
Pro Tip: if you are trying to shine another type of copper items and don’t have to worry about scratching the surface, try adding salt to the ketchup. This will increase its cleaning power.
Pointer #20: Clean Your Home Starting at the Top and Ending at the Bottom
You have probably said that you are going to clean your home from top to bottom at some point or another.
Despite this, you may have not actually meant it and, instead, gone on to clean your home in a haphazard manner.
Well, if this describes your cleaning method, then you need to change your strategy.
Instead, literally start cleaning from top to bottom. So, start with the ceilings, walls, fans, cupboards that are placed higher up, etc.
Then work your way down to the lower levels.
This method will ensure that you clean your house more thoroughly and that there will be no odd marks or dust bunnies left around.
So, there you have it – a number of house cleaning pointers that are sure to make it a lot easier for you to clean your home.
Let us know what you think of the tips here and tell us about any special tactics that you may be using as well!
Related Guides: Best Fabric Softeners
